Why Scraps of Grace you ask??? Primarily because it is through God's grace that I am able to do what I love...scrapbooking, cardmaking, basically anything that has beautiful paper and embellishments involved. This is also a place to share my work as well as whatever is on my heart. A creative outlet for the mind, body, and soul.

I encourage you to relax, read, and browse a while and I hope that your day will be brightened and blessed by what you encounter.

Thursday, July 23, 2015

Posting Up Some Disney Fun

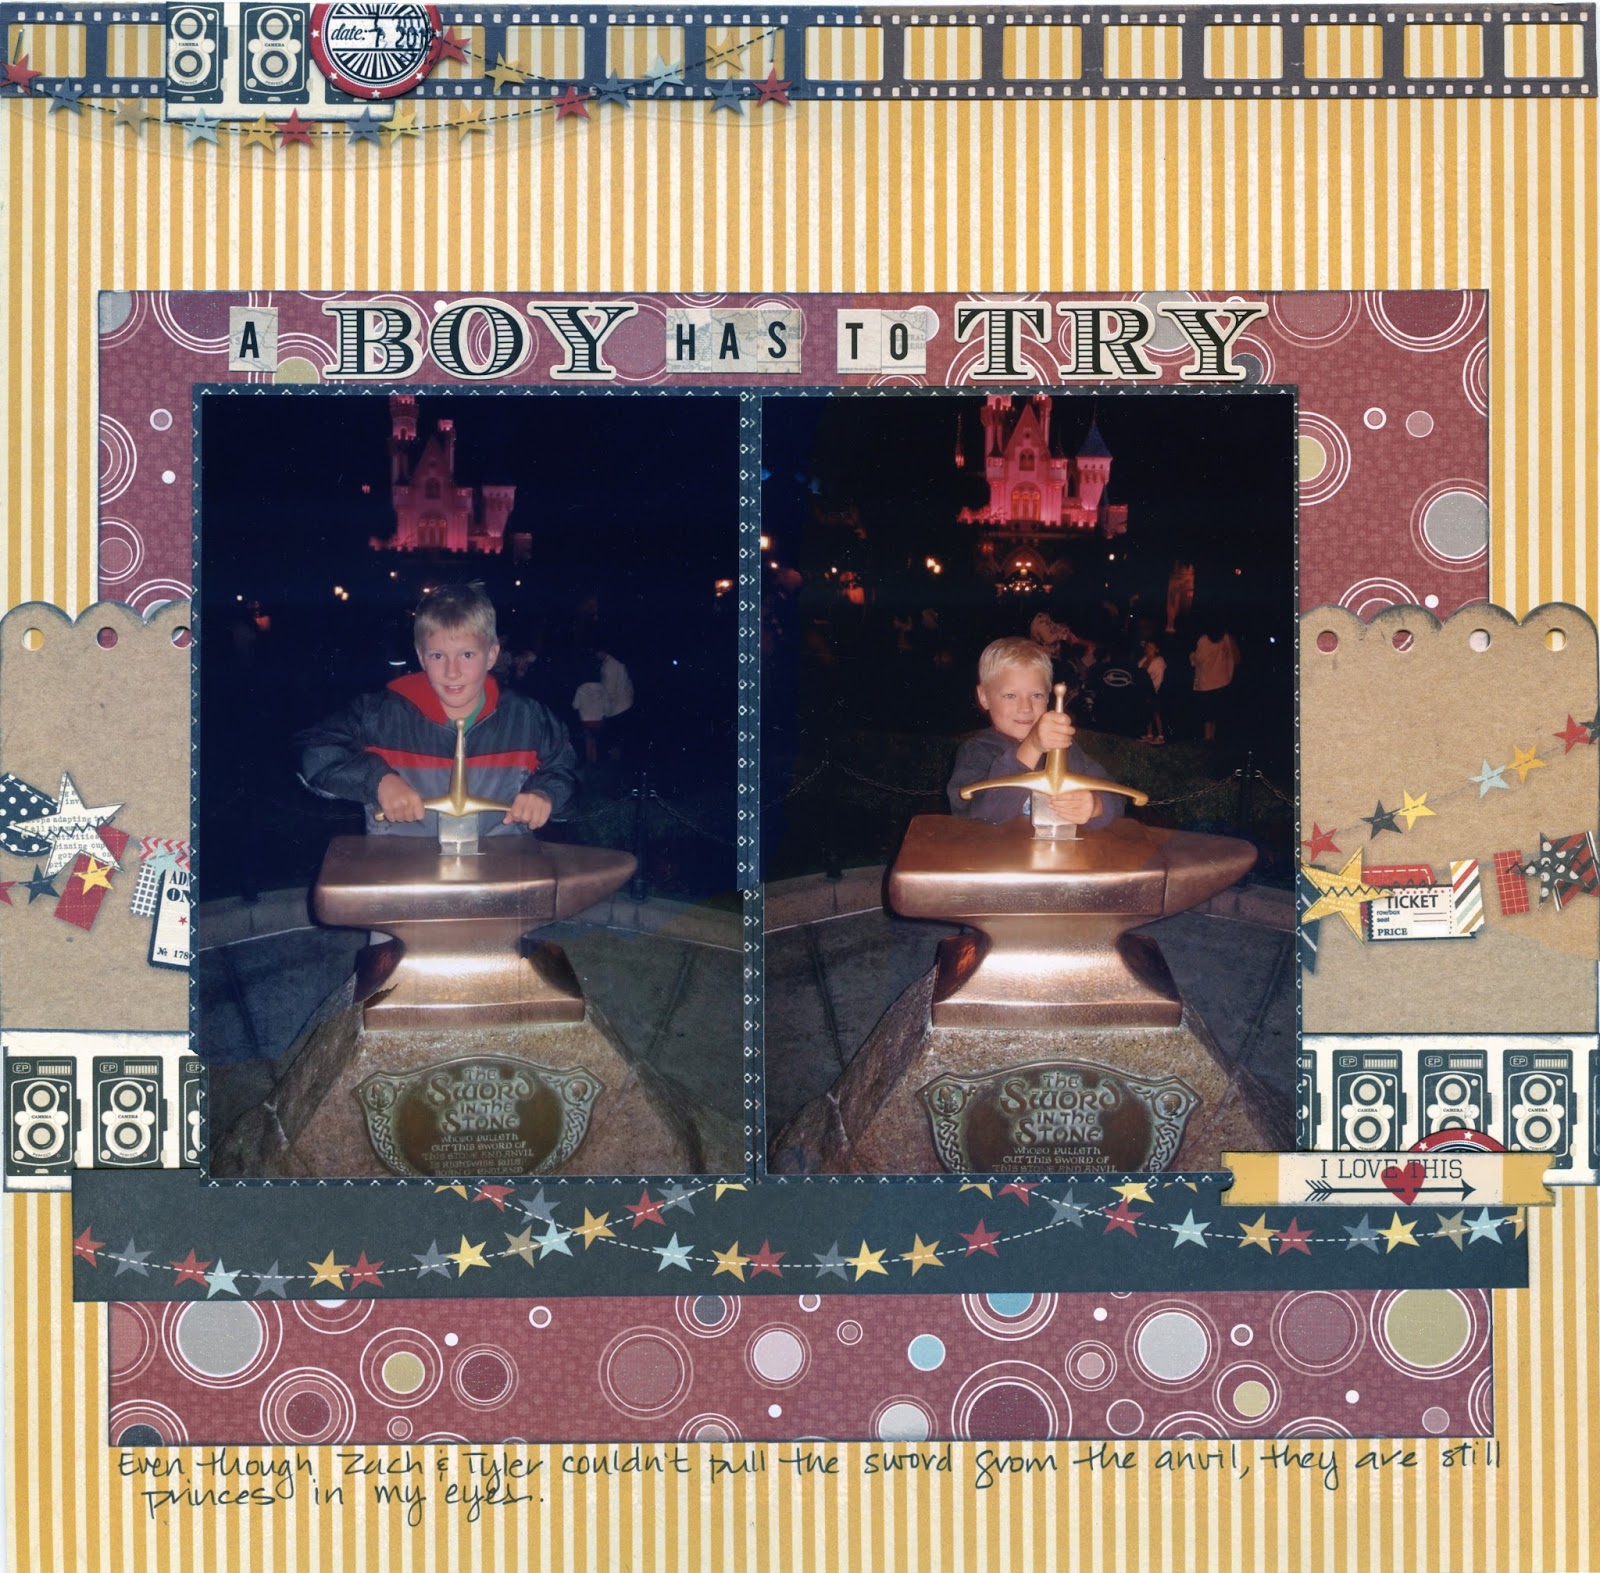
Eleven layouts later and I've finally got our family trip to Disneyland and Disney California Adventure documented and tucked into a scrapbook.  I had no idea I had so many pictures (not all good mind you) that I wanted to document.  I primarily used the Simple Stories Say Cheese I line to put all the layouts together but threw in bits and pieces from other collections as needed.

Enjoy our day at the park!

You can't really tell in the photo but I die cut the round gears using kraft cardstock and then colored over them with my white Wink of Stella pen.  When I heat set them with my heat tool, the white melted into the paper and all that's left is a beautiful, silvery shimmer that mimics the silver in the picture from Tomorrowland.
Supplies used: Cardstock – Neenah (Desert Storm); Chipboard – Simple Stories; Die Cuts – Silhouette Cameo; Ink – VersaFine (Onyx Black); Patterned Paper – My Mind’s Eye & Simple Stories; Pen – Zig Wink of Stella (Glitter White) & Zig Writer (Pure Black); Stamp – K & Co.; Stickers – Simple Stories; Transparency – Simple Stories

Supplies Used: Brads – Basic Grey & Recollections: Cardstock – Recollections: Chipboard – Simple Stories; Ink – ColorBox Fluid Chalk Ink ( Charcoal); Patterned Paper - Cosmo Cricket & Simple Stories; Pen – Sakura Micron (Black) & Zig Writer (Pure Black); Stickers – Simple Stories; Title – Simple Stories
Can you see Mater peeking out of that little "Magical Memories" pocket?  Those are our entrance tickets into the park!  I loved being able to incorporate this memorabilia into the layout.
Supplies Used: Brads – My Mind’s Eye; Cardstock – Recollections; Chipboard – Simple Stories; Enamel Dots – Theresa Collins; Ink – VersaFine (onyx Black); Patterned Paper – Simple Stories; Pen – Zig Writer (Pure Black); Pocket – SNAP Pockets Simple Stories; Stamp – K & Co.; Stickers – Simple Stories; Thread – craft supplies; Title – Simple Stories; Transparency – Simple Stories;  Wood Veneers – Studio Calico
Not sure what happened to the color of the red polka dot paper on the right side but when I scanned it, it appears to be a totally different color than the rest of the layout.  I assure you it's all the same color red in person.
Supplies used: Color Shine – Heidi Swapp; Chipboard – Simple Stories; Die Cuts – Silhouette Cameo; Ink – ColorBox Fluid Chalk Ink (Alabaster); Patterned Paper -  Die Cuts With a View & Simple Stories; Pens – Gelly Roll (Opaque White) & Zig Writer (Pure Black); Stamp – K & Co.; Stickers – Simple Stories; Title – Simple Stories & Thickers (Rocketeer)

Supplies used: Cardstock – American Crafts; Chipboard – Simple Stories; Ink – VersaFine (Onyx Black); Patterned Paper – Echo Park Paper Co., Kaiser Craft & Simple Stories; Pen - Zig Writer (Pure Black); Stamp – K & Co.; Stickers – Basic Grey, Creative Imaginations, My Mind’s Eye & Simple Stories
This layout actually has a ton of photos on it.  The zig zag vellum creates a pocket that hold two small layouts that hold several photos each.  This was a design from Shimelle Laine back in her 4x6 photo love days.
Supplies Used: Cardstock – Neenah (Desert Storm); Chipboard – Crate Paper; Ink – ColorBox Chalk Ink (Charcoal) & StazOn (Jet Black); Patterned Paper – Simple Stories; Stamp – K & Co.; Stickers – October Afternoon & Simple Stories; Title – Making Memories & Simple Stories; Vellum – Crate Paper – Washi Tape – My Mind’s Eye; Wood Veneers – Studio Calico
Supplies Used: Cardstock – Bazzill (Swiss Dot); Chipboard – Simple Stories; Enamel Dots – My Mind’s Eye; Ink – StazOn (Jet Black) & VersaFine (Onyx Black); Patterned Paper – Simple Stories; Pen Micron Pigma 0.5 (Black); Stamp – K & Co.; Stickers – Echo Park Paper Co., October Afternoon & Simple Stories
This was such a fun layout to do.  The photo on the far right was take back in 2004 of our oldest son during one of our trips to Disneyland.  Funny how his younger brothers 8 years later gravitated toward the same rope!  Fun to see the comparison of them all over the span of time.
Supplies Used: Border punch – EK Success; Cardstock – Bazzill; Chipboard – Simple Stories; Die Cuts – Crate Paper; Enamel Dots – My Mind’s Eye & Theresa Collins; Font – Papyrus; Ink – ColorBox Fluid Chalk Ink (Charcoal); Number Stickers – Fancy Pants;  Patterned Paper – Echo Park Paper Co., My Mind’s Eye & Simple Stories; Pen – Zig Writer (Pure Black); Stickers – October Afternoon; Title  - Thickers (LAX Black)
Supplies Used: Border Sticker – Crate Paper; Ink – ColorBox Fluid Chalk Ink (Charcoal) & StazOn (Jet Black); Patterned Paper – Basic Grey, Cloud 9 Design, Echo Park Paper Co., My  Mind’s Eye & Simple Stories; Pen – Zig Writer (Pure Black); Pocket – SNAP Pockets Simple Stories; Stamp – K & Co.; Stickers – Simple Stories; Title – Echo Park Paper Co.
Supplies  Used: Ink – VersaFine (Onyx Black); Overlay – Simple Stories; Patterned Paper – Jillibean Soup, Kaiser Craft & Simple Stories; Stamp – K & Co.; Stickers – Simple Stories; Title – Simple Stories; Wood Veneers – Studio Calico
Supplies used: Cardstock – Bazzill (Two Scoops Pistachio Nut); Chipboard – Simple Stories; Glitter Paper- Die Cuts With a View; Ink – VersaFine (Onyx Black); Patterned Paper – Simple Stories; Stamp – K & Co.; Stickers – Simple Stories; Title – Simple Stories; Transparency – Fancy Pants; Washi Tape – Echo Park Paper Co. 

Pin It!

Saturday, March 7, 2015

Rounding Out the Trip

I'm sharing the rest of the layouts from our Summer 2010 trip today.  I love how quickly I was able to create all these layouts and I think it's because I pulled all the pictures from this trip and then systematically worked through them one day at a time.  I completed all the layouts in less than a week (which is record setting for me).  Here's the last 3 layouts...

Supplies Used:  Cardstock - Bazzill (Brown); Die Cuts - Crate Paper & Elles Studio; Ink - Distress Ink (Frayed Burlap); Patterned Paper - Basic Grey, Recollections & Simple Stories; Pens - Copic (Ice Ocean BG72) & Bic MarkIt (Cloud Nine Grey); Sketch - Liz Chidester The Scrappiest; Stickers - Cosmo Cricket; Title - Basic Grey; Wood Veneers - Studio Calico

May favorite addition to The Plunge was the use of the raindrop wood veneers from Studio Calico.  I colored them with a Copic marker and then flipped them to make them look like splashes of water.
Supplies Used: Cardstock - Bazzill (Carob); Die Cuts - Basic Grey & Chic Tags; Enamel Dots - Doodlebug & Recollections; Patterned Paper - Basic Grey; Pens - Bic MarkIt (Tiki Hut Tan) & ZigWriter (Chocolate); Sketch - Jana Eubank; Stickers - My Minds Eye & October Afternoon; Title - Thickers; Wood Veneers - Studio Calico
I scored a huge paper pad of Basic Grey Hey You at Tuesday Morning not too long ago and the colors along with some Basic Grey embellishments were perfect with the oranges and blues in the Evans Plunge sign and our son's swim shorts.  The Evans Plunge sign is a photo I took of the sign itself and then I trimmed it down to cut out all the distractions that were on the wall around it.  It worked out perfectly to fit with the sketch I based this layout on.

Supplies Used: Brads - Basic Grey; Cardstock - Recollections (Kraft); Ink - Distress Ink (Frayed Burlap); Journaling Card - Basic Grey; Patterned Paper - Echo Park Paper Co.; Pen - Bic MarkIt (Tiki Hut Tan); Sketch - Liz Chidester The Scrappiest; Stickers - Echo Park Paper Co., October Afternoon & Webster's Pages; Title - Echo Park Paper Co.
So that wraps up our trip.  I have some pictures from Mt. Rushmore that for some reason I didn't have printed so I'll have to send those images off and order prints to truly finish up this family vacation...but for now, this one is done.

Now I'm onto documenting our Disneyland/California Adventure trip from 2012!
Pin It!

Wednesday, March 4, 2015

Together is...

This layout is where it all started...documenting this vacation from 2010.  It was such a memorable trip traveling in the RV with the family, seeing the sites and visiting my grandparents farm.  This photo was taken as we were getting ready to pull out of the driveway of the farm and hit the road for home.  My grandparents always took such pride in the beautiful antique gas pump.  Grandma used to paint the globe that sits atop the pump and lights up at night by hand so it stayed looking good.  Such fond memories!

Supplies used:  Cardstock - Bazzill; Die Cuts - Crate Paper; Enamel Dots - Doodlebug Designs, My Mind's Eye & Theresa Collins; Ink - Distress Ink (Frayed Burlap); Journaling Tag - Shabby Chic Crafts; Mini Paper Clips - Tim Holtz; Patterned Paper - Simple Stories; Pen - ZigWriter (Pure Black); Rub On Numbers - Doodlebug Designs; Stickers - Echo Park Paper Co. & October Afternoon; Wood Veneers - Studio Calico
I worked with lots of product I have on hand and mixed and matched manufacturers to make it all come together.  This is one of my favorite things to do - mix it up and use up some older supplies.  Kind of like cleaning house - but a whole lot more fun!
Pin It!

Monday, February 16, 2015

Gone Fishing

Remember the old Shimelle 4x6 Photo Love?  I went digging looking for a sketch to help me put these 3 photos onto a layout and ended up back at this post with my focus on the Photo Booth Love layout that led me to create this layout of my own.

I wanted to be able to incorporate a lot of different patterned papers so the layout wouldn't be all brown and green (the primary colors in the pictures).  I love how the little blocks of several papers brings some pop of color to the whole piece without overwhelming the photos.

Supplies Used:  Brads - Basic Grey; Cardstock - Bazzill (Walnut Cream); Ink - StazOn (Timber Brown); Journaling card - Echo Park Paper Co.; Patterned Paper - Echo Park Paper Co.; Pen - ZigWriter (Chocolate); Stickers - Echo Park Paper Co. & October Afternoon; Title - American Crafts Thickers (Stroll)

Pin It!

Thursday, February 12, 2015

Fetch a Pail of Water

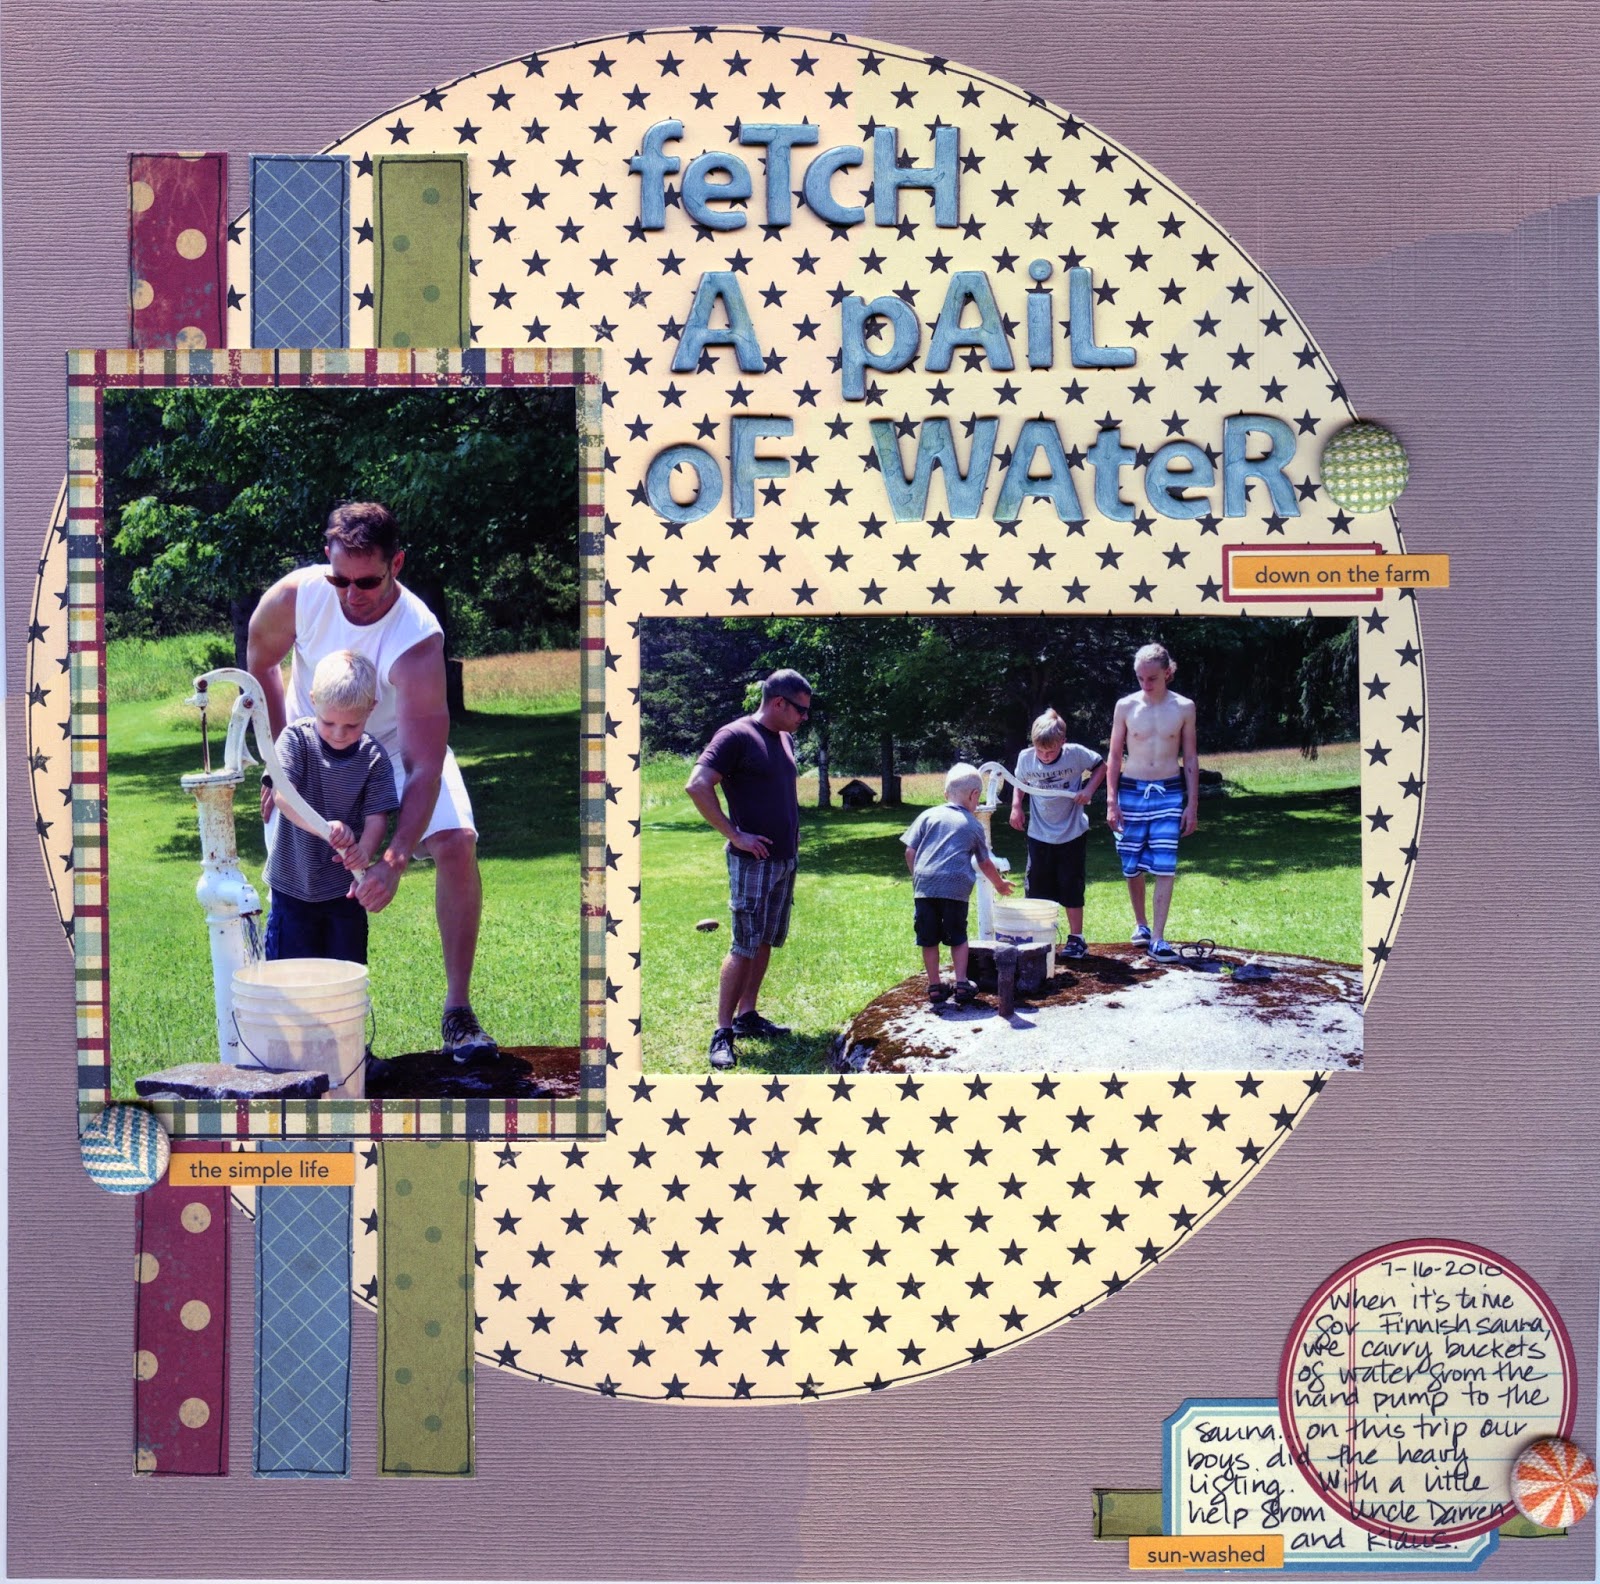
Sharing another layout from our family road trip.  This is at my grandparents' farm.  Our boys got such a kick out of using the hand pump to fill buckets of water to carry to the Finnish sauna.  I have the same memories from my childhood and am so glad we were able to make this trip and create these memories with our boys.

Supplies Used:  Brads - Cosmo Cricket; Cardstock - Bazill (Quicksand); Patterned Paper - October Afternoon & Simple Stories;Pen - Copic (BG72 Ice Ocean) & Micron Pigma (Black); Stickers - October Afternoon; Title - Basic Grey 
For the title I didn't have any letters in the color I was looking for but the Basic Grey white chipboard alpha set worked perfectly when combined with a little Copic marker coloring.   It's hard to tell in the picture but they actually came out a little uneven in the coloring so it mimics the look of water.  Perfect!
Pin It!

Saturday, February 7, 2015

On The Lake

I'm determined to get the photos from this vacation we took as a family back in 2010 (oh my) put on to layouts.  Not sure how I neglected to take care of them sooner but they obviously got overlooked - or maybe I just wasn't inspired at the time.  Needless to say, they are getting taken care of now.

Supplies used:  Cardstock - Bazzill (Kraft); Enamel dots - Dooblebug Design; Ink - StazOn (Timber Brown); Journaling card - Echo Park Paper Co.; Patterned paper - Doodlebug Design & Echo Park Paper Co.; Pen - ZigWriter (Chocolate); Stickers - Echo Park Paper Co. & October Afternoon; Thread - Aunt Lydia's Carpet Thread; Title - Chic Tags; Wood Veneers - Studio Calico
I have noticed that many of the pictures from this trip aren't fantastic and maybe that is what dissuaded me from putting them into my books.  In hindsight, I don't really care how good the pictures are, it's more the story they tell that I want to hang on to.  It was a great trip seeing some amazing sights, spending lots of time with my siblings, parents and uncle and those are the things I want to be reminded of when I look back through my scrapbooks.  
Pin It!

Thursday, January 29, 2015

Teen Traveler

I have another layout to share with you all.  I found an entire box of photos dating back to 2010 that I hadn't yet scrapped - who am I kidding...I found photos from 2010 all the way to 2014 that I haven't scrapped.  At least I know I won't run out of material any time soon.  Anyhow, this "teen traveler" isn't even a teen anymore but I still love putting together layouts with him in them.

Supplies Used:  Brads - My Mind's Eye; Card stock - American Crafts; Die Cuts - Crate Paper; Ink - ColorBox Chalk Ink (Charcoal); Journaling Card - Simple Stories; Number Sticker - Echo Park Paper Co.; Patterned Paper - Basic Grey & Simple Stories; Pens - Copic (Dark Red R89) & ZigWriter (Pure Black); Stickers - American Traditional Designs, Echo Park Paper Co. & October Afternoon; Title - Echo Park Paper Co.; Wood Veneers - Studio Calico 
I had to get creative with the number "1" in 15 at the top right since I couldn't find a circle with the number on it that looked right for the layout.  I took a Crate Paper die cut and colored it in with a Copic marker to get the color I wanted then I outlined a number sticker from the Echo Park Paper Co. and added it to the top of the red circle die cut - worked like a charm.  

Lots more layouts to come from this same trip...keep an eye out for them.
Pin It!

Tuesday, January 20, 2015

March to the Beat of Your Own Drum

It has been forever since I have shared any projects here.  Life has gotten busy and I let this wonderful hobby slip by the way side.  My husband asked me why I hadn't been scrapping and I couldn't give him a reason other than I'd been busy.  He simply said "So go do it".  And now I can't stop.  Four layouts in three days and I'm feeling like I'm on a roll.

This is a really old picture - I found stacks of old photos that I haven't scrapped so I better get busy.

Supplies used:  Cardstock - Bazzill; Chipboard Stickers - My Mind's Eye; Cork Sheet - Canvas Corporation; Die Cuts - Crate Paper & y Mind's Eye; Ink - StazOn (Jet Black); Journaling cards - Pebbles.; Patterned paper - Echo Park Paper Co. & My Mind's Eye; Pen - ZigWriter; Stickers - My  Mind's Eye & October Afternoon; Title Card - Pebbles; Twine - The Twinery; Wood veneers - Studio Calico

Pin It!

Friday, August 29, 2014

Our Favorite Snow Games

So Summer is drawing to a close and I didn't do any scrap booking while my kids were out of school.  Between their busy baseball schedules and my busy work schedule (VBS was a blast even though it was a ton of work) I didn't have any free crafty time.  This is an older layout that has been laying around my craft table and I figure since our evenings are getting colder (say it isn't so) these types of scenes aren't too far off.  My layout was inspired by Jana Eubanks “Our Favorite SnowMan” layout.  I had fun trying to re-create a similar feel using my Silhouette and papers that I had on hand.  

Supplies used: Alphabet Stickers – Echo Park Paper Co.; Die cut – Silhouette Cameo; Enamel dots – My Mind’s Eye & Theresa Colins; Ink – ColorBox Chalk  Ink (Chestnut Roan); Patterned Paper – Basic Grey & Echo Park paper Co.; Pen – ZigWriter (Chocolate); Stickers – Echo Park Paper Co.; Twine – craft supplies; Wood veneer – Studio Calico
The kids are off to school which means I've got work to do around here.  We have a birthday party celebrating our youngest tonight so I better get moving.  Be blessed!
Pin It!

Friday, March 14, 2014

The Big Freeze

Since spring is almost upon us (although that means very little here in Colorado - our biggest storms almost always hit in the spring) I thought I better get to sharing some of the winter layouts I've been plowing through.
 
Supplies used:  Alphabet stickers – American Crafts & Basic Grey; Border Sticker – My Mind’s Eye; Embossing Powder – Zing (opaque white); Enamel dots – My Mind’s Eye; Ink – ColorBox Chalk Ink (Charcoal) & Versamark; Journaling cards – Echo Park Paper Co. & Simple Stories; Patterned paper – Echo Park Paper Co. & My Mind’s Eye; Pen – Bic MarkIt; Stamps – Martha Stewart Crafts; Stickers – Echo Park Paper Co. & October Afternoon; Washi Tape – My Mind’s Eye; Wood veneers – Studio Calico
 
This fountain sits in the heart of our downtown and the year I took this photo, they hadn't turned off the water flow before we got a big storm.  The result was beautiful icicles hanging all around the fountain.  The kids and I were fascinated by the enormity of those ice chunks hanging off the sides.
 
For this layout, I mixed some brand new Echo Park papers with some older Echo Park.  I love how the colors in their current collections are able to tie back to their older collections...it makes using up those last bits of paper and embellishments so much easier.  The snowflakes running across the page are Martha Stewart stamps that I embossed in white embossing powder - these stamps are so lovely and detailed and the fact that those details even come through when embossing the images truly speaks to the quality of the stamps. 
 
Today we're expecting a warm up here but they are talking about snow coming again tomorrow so we'll throw on our capris and short sleeve shirts and enjoy the warmth while we can!
Pin It!

Tuesday, February 25, 2014

Snapshot - Captured with Vellum

Supplies used:  Border stickers – Creative Imaginations; Cardstock – The Paper Company; Die cut – Silhouette Cameo; Ink – StazOn (Timber Brown) & ColorBox (Chestnut Roan); Journaling sticker – Bella Blvd.; Patterned paper – Echo Park Paper Co., Pebbles & We R Memory Keepers; Stamps – Studio AE by Technique Tuesday; Stickers – Echo Park Paper Co., October Afternoon & Simple Stories; Tiny Attacher – Tim Holtz; Vellum – The Paper Co.; Washi tape – My Minds Eye
 
I love these photos my husband took of one of his favorite hobbies.  Everything about fly fishing makes him happy; from tying his own flies to scouting the rivers and streams to find the perfect spot to lay out his line.  I wanted to photos to speak for themselves - there really wasn't any journaling required but I probably ought to add some so in the future people will know why they're looking at these photos and why they were important to me. 
 
Overall a pretty simple layout.  My goal was to use vellum and I found this sketch somewhere (it may be from Shimelle Laine) and thought it worked perfectly to use the vellum to soften the green a bit so it didn't dominate the layout but still let a bit peek out.  The hardest part about vellum for me is attaching it to my layout in a way that doesn't show a bunch of adhesive.  That may explain why I don't use it very often.  I have lots of it though so I better get over my fears and just jump in. 
 
Pin It!

Tuesday, January 7, 2014

Dreaming of Warmer Days

These bone-chilling temperatures that are being felt across our country have me dreaming of warmer days.  I can't wait until we can play in the rivers and camp again.  Until things warm up though, I'll just have to look through old photos and be reminded of what is to come.
 
This layout was from Father's Day several years ago when my husband, our littles and I headed to a local river so he could fish and the boys could play.  It was a lovely way for him to spend Father's Day - doing what he loves with his family right beside him.
 
Supplies used:  Cardstock – Bazzill; Chipboard – My Minds Eye; Die cuts – Jillibean Soup, My Minds Eye & Silhouette Cameo; Enamel dots – Doodlebug Designs & My Minds Eye; Font – Rio Oro (Dafont.com); Patterned paper – My Minds Eye; Pen – Zig Writer (Chocolate); Stickers – Crate Paper, Echo Park Paper Co., EK Success, Jillibean Soup, Karen Foster Design & My Minds Eye; Tag – Michael's; Wood veneer – Studio Calico
The great primary colors in this My Minds Eye paper collection made it so easy to pull in supplies from many other collections (both very old and some newer).  I love being able to mix and match bits a pieces from the stuff I already have on hand. 
 
I'm thinking I need to pull out all the pictures I've printed from our Kauai trip this past spring and continue dreaming of warmer days and sunshine until this cold front passes through!
Pin It!

Tuesday, December 3, 2013

Trying to Catch Up

I have a few layouts and several cards that need sharing here on my blog but my days seem to be quite full lately.  I'm going to try to pop in here quickly and at least get some images up to share with you.
 
This layout highlights boy #2's first pair of glasses.  Everyone in our family except the youngest wears glasses so I figured it was only a matter of time before this one started wearing them...now if we could only figure out a way to keep from leaving them at school when we need them at home or leaving them at home when they're needed at school. 
 
Supplies used:  Die cuts – Chic Tags, Elles Studio, Fancy Pants & craft supplies; Enamel dots – Doodlebug Designs Inc.; Ink – SEI Chalk Ink (Cocoa) & Smooch Spritz (Log Cabin); Letter stickers – Thickers (Jewelry Box); Paper Clips – Tim Holtz; Patterned Paper – Fancy Pants & We R Memory Keepers; Pen – ZigWriter (Chocolate); Stickers – Fancy Pants, October Afternoon & craft supplies
I mixed some old and new in on this one.  I outlined almost everything I added to the layout to help it pop off the darker blue background.  The big heart sticker said "a face only a mother could love" but I didn't like that sentiment for this layout so I placed some tiny alpha stickers over the "only" and replaced it with "this".  Now it reads "a face this mother could love".  This was a pretty quick layout and in retrospect I think I would have chosen a different title like A Sight for Sore Eyes...that's okay.  The photos and story behind them are documented and that is what is important.
 
Pin It!

Tuesday, November 26, 2013

It's Beginning to Look a Lot Like Christmas...

Not really...it's been bitter cold out here but very little snow so everything is crisp and brown in our corner of the world.  I'm ready for snow to cover it all up and be sparkly and white.  Meanwhile, I've been working on a few Christmas projects with many more to come (hopefully)
 
My husband's annual holiday party for his work is coming up soon and every year I make the place cards for the event.  I opted to use a new stamp set that I recently acquired from Lawn Fawn called Bows and Holly.  If you haven't tried Lawn Fawn's stamps, they are amazing.  I love them for coloring in.  The quality that they stamp is so crisp and clear leaving you with beautiful images to color in.  These are the finished place cards.
 

Supplies used: Cardstock - Neenah Solar White; Ink - Memento (Tuxedo Black); Pens - Copic (G24, YG61, YG 63, R22, R29, & R89), Sakura Gelly Roll (Clear Star)
 
I used Copic markers to color in the holly leaf and mistletoe stamps.  Once I had colored the images in, I took my Sakura Clear Star pen and added some glittery shine to the red berries for a bit of bling.  It's Christmas...you;ve got to have bling at Christmas!


Pin It!

Monday, November 25, 2013

Mapping it All Out

I have so much to share and yet I haven't been getting it up here on my blog.  I've been so busy taking care of business that the projects are piling up in my craft space.  I finally finished that big home decor project I had mentioned.  It's a map of the United States made with my Silhouette Cameo, patterned paper that I already had in my office, and some wood slats leftover from an old bed frame we no longer have in our house.  Wanna see???
 

Supplies used: Ink - ColorBox Chalk Ink (Charcoal); Patterned paper - Chatter Box, Crate Paper, Echo Park Paper Co., Graphic 45, My Minds Eye, October Afternoon and Simple Stories

The entire map was a Silhouette download that they offered as a weekly freebie quite some time ago.  I enlarged the map to fit the black foam core board I planned to use and then ungrouped the entire map.  I die cut each state and then inked around the edges using ColorBox Chalk Ink and a paint brush to get into all the little detail areas.  I wanted to ink up the edges so it would not only help to define the shape of each state but it would help each map piece blend into the black background where pieces didn't come together exactly.  Once the pieces were ready, I assembled the map using Mod Podge.  I finished the map off by adding a few coats of Mod Podge over the entire foam core board to protect it all.

For the base, my wonderful husband trimmed each plank to the size I needed and then secured them all together.  I stained the entire thing with a dark walnut stain that I roughed up a bit with sand paper once it was all dry.  I attached the foam core board to the wood planks using Beacon's Hold the Foam Glue for Styrofoam and my hubby hung it up.  I love how it turned out.  The finished size is roughly 35" x 25" including the plank base.  The colors match the colors in our family room perfectly and now that empty alcove above the fireplace has something to fill it in!
Pin It!

Tuesday, October 29, 2013

Halloween 2009

In honor of halloween this week, here is a layout of some photos from halloween 2009.
 
Supplies used: Alphabet chipboard – AC Thickers (Jewelry Box); Brads – Basic Grey; Cardstock – craft supplies; Ink – StazOn (Timber Brown); Patterned paper – BoBunny and Die Cuts With a View; Pen – ZigWriter (Chocolate); Rub-on Numbers – Doodlebug Design Inc.; Speech Bubble – Cosmo Cricket; Stickers – My Mind’s Eye; Washi tape – My Mind’s Eye
I really wanted to include all 3 photos from events leading up to Halloween which didn’t leave a whole lot of room for journaling on this single-page layout.  Using a simple list format for my journaling and rub-on numbers in both black and white from the same product line allowed me to fit it all in easily.  I kept the embellishments fairly simple by cutting a My Mind’s Eye label in half and tucking each half under the speech bubble to add a little more interest to the top corner and finishing each embellishment cluster off with matching brads from Basic Grey. 
Pin It!

Thursday, October 24, 2013

One of a Kind Costumes

It's almost Halloween so I figured I ought to scrap these really old photos of our younger boys trying on costumes that we had received from a friend of the family.  Her boys are adults now but back in the day when they were young, she took the time to make amazingly crafted costumes for them.  She passed them along to me when her boys had outgrown them and I have saved them all these years until our boys could wear them.  They've outgrown most of them now too but when these photos were taken, they could fit into most of them and they had so much fun trying them all on - mixing and matching them just for fun.  It was an evening full of giggles.
 
Supplies Used: Cardstock – Bazzill (swiss dot) & The Paper Co.; Enamel dots - My Mind’s Eye; Ink – ColorBox (Green) & StazOn (Timber Brown); Patterned paper – Echo Park Paper Co.; Pen – Zig Writer (Chocolate); Stamps – Studio AE by Technique Tuesday; Stickers – Echo Park Paper Co.; Tags – Jenni Bowlin & Michaels; Wood veneers – Studio Calico
This years costumes are partially ready.  Both boys are going to be "Steve" from Minecraft.  We have the heads and swords but I have to figure out what they are going to wear on the rest of their bodies...I wish I had more time to build them a square body to match the character.  Who knows, maybe I'll get some inspiration and get to crafting something before next Thursday.  
Pin It!

Thursday, October 17, 2013

Making our Home More Home-y

I've worked on several home decorating projects lately and have another big one in the works.  Just thought I'd share what I've been up to in making our home a little more comfy for us.
 
First up is this cross that I decorated for our master bedroom.  I used a quote from Bob Hazlett who was a guest speaker at our church a while back.  It says "Every problem we have is an invitation to learn who God is."  I love that... 
I covered a paper mache cross that I found at Hobby Lobby with acrylic paint then I decoupaged on the polka dot patterned paper.  Next I took the beautiful vintage lock from Blue Fern Studios, inked it up with brown ink then softened the edges with white ink, tied some twine around it and added an enamel dot.  The wood veneer hearts got a little ink around the edges and an enamel dot of their own then I glued them onto the cross.
 
Here are some detail shots...
 
 
Next up is a Fall decoration piece that hangs out in our family room.
This Fall subway art was a freebie download from the Internet.  I can't find my original source for this Silhouette file...sorry!  It is a print and cut file that I printed on our color printer then I used my Silhouette Cameo to cut out all the little details - the acorns, pumpkins and leaves.  I inked the edges of these little bits then glued them to the printed image.   I then mounted the finished image onto patterned paper and popped it into an 8x10 frame I found at Michael's.  I love how it turned out the warm, rich colors make me want to curl up in front of the fireplace.  I made a second one of these for a harvest themed auction basket for son #3's class.
 
This next project was for the Jingle Bells themed auction basket for son #2's class but I will be making another one to fill in the above frame when Christmas decorations come out in our house.
This print and cut file I created myself in my Silhouette software using some existing files I had purchased.  I printed the image on our color printer and then cut the little details (holly leaves, trees, and poinsettia flowers) out of patterned paper and cardstock, inked the edges and glued them to the printed image.  Once again, I matted the finished image on patterned paper and popped it into an 8x10 frame. 
 
The big project I'm working on is a map of the United States for a blank wall in our family room.  I have all the states cut out and I've inked all the edges, now I have to adhere it to a black foam core board and cover it with Mod Podge to protect it.  I think I'll use some wood planks I have in the garage to mount the foam core board on and then up it will go.  I promise to share pictures when it's completed.
 
I'm off for now...the boys and I have to figure out what they are going to dress up as for Halloween while they're home on their Fall break this week so I better get moving...the week is almost over!

Pin It!

Thursday, September 26, 2013

Silly Season...

I love how playful my husband is with our boys.  When I took these pictures, he thought nothing of it.  Boy #3 was being silly and hamming it up for the camera so why wouldn't my husband do it too?  Our boys are blessed that their Daddy has no problems being just a silly as they are, especially since Mom tends to be the more serious one of the bunch.
 
Supplies used: Alphabet stickers – Echo Park Paper Co.; Brads – My Mind’s Eye; Cardstock – Neenah (Desert Storm); Font – My Own Topher; Ink – ColorBox Fluid Chalk (Charcoal) & Jenni Bowlin (Cough Syrup); Patterned Paper – Echo Park Paper Co., My Mind’s Eye & Simple Stories; Tag – Chic Tags; Washi tape – My Mind’s Eye; Wood veneers – Studio Calico
I love the dimension that the My Mind's Eye patterned paper adds as the background - not quite black, not quite gray and certainly not boring.  I ran the Chic tag through my laser printer to add the journaling and cut apart one of the tag sheets from the Simple Stories 24/7 collection to help create the embellishment clusters.  The old fashioned cameras came from an Echo Park Paper Co. border strip. For the single camera, I simply fussy cut, inked the edges and put it on dimensional adhesive.

Pin It!

Thursday, September 19, 2013

Card Lovelies...

It seems we are in another season of celebrating around our household.  Lots of birthdays and some new babies getting ready to make their grand debut into this world as well as some folks getting ready to tie the knot.  All of this celebrating is cause for some creative card making.
 
First the birthdays...

I used the Simple Stories Say Cheese collection to create the card and gift tag. 
 Here's the card for the new wee one about to be welcomed to this amazing world.
I used Simple Stories Summer Fresh and Crate Paper Little Boy Blue collections along with my Silhouette to create this card.  The alphas are REALLY old Heidi Swapp and the brads are a combination of My Mind's Eye and Basic Grey.
Like I said, lots of celebrating.  There's a bridal shower and wedding on the horizon that I'll be making cards for as well but those are still in the works. 
 
Keep celebrating my crafty friends!
Pin It!